-
Pacific Trails Resort Case Study
Chapter 11 - Multimedia
See Chapter 2 for an introduction to the Pacific Trails Resort case study. Figure 2.36 shows a site map for the Pacific trails website. Use the Chapter 9 Pacific Trails website as a starting point for this case study. You have the following tasks in this case study:- Create a new folder for this Pacific Trails case study.
- Add a video to the homepage (index.html) and update the external CSS file.
- Configure an image gallery on the Activities page (activities.html) and update the external CSS file.
Hands-On Practice Case Study
Task 1: Create a Folder.
Make a copy of the pacific09 folder. Rename the copy pacific11. All work for
this assignment will be done on the files in the new pacific11 folder..
Caveat: keep in mind that if the extra credit causes errors in the site,
points will be deducted. The fact that they were caused by the "extra credit"
code will not will not be accepted as a reason for errors. If uncertain,
delete the page and the related code from your website..
- Again, a screen, print, and mobile version will be required.
- Inside the pacific11 folder, create a folder called media.
- Copy the video files from the chapter11/casestudystarters folder in the student files and save them in your pacific11/media folder: pacifictrailsresort.mp4, pacifictrailsresort.ogv, pacifictrailsresort.jpg, and pacifictrailsresort.swf.
- Copy the image files from the chapter11/starters folder in the student files and save them in your pacific11/images folder: photo2.jpg, photo3.jpg, photo4.jpg, photo6.jpg, photo2thumb.jpg, photo3thumb.jpg, photo4thumb.jpg, and photo6thumb.jpg.
Task 2: Configure the Video.
- Launch a text editor and open the home page (index.html)
- Replace coast.jpg with pacifictrailsresort,jpg.Assign a class displayImage
- Add a an HTML5 <video> control.
- Configure the video, source, assign the class displayVideo and embed elements (example p. 471)
to work with the following files (the dimensions of the video are 320 pixels
wide by 240 pixels high):
- pacifictrailsresort.mp4
- pacifictrailsresort.ogv
- pacifictrailsresort.jpg
- pacifictrailsresort.swf
- Save and validate the file. Correct and retest if necessary.
Task 2: Configure the Video's CSS.
- Place all of the CSS selectors related to the website media in one area of the CSS file. Separate and identify this area using comments, similar to what was done previously. This will make the code easier to read and update as needed. Example: /* ------------------ Media -------------------------*/
- There is an issue with the print version displaying either a gray box or a blank space where the video should be. The following code toggles between the pacifictrailsresort.jpg image and the video based if it is the print or screen/mobile version.
- Open pacific.css and make the following modifications in the /* --- main
--*/ area
- Add main video and main
embed to the following rule
main img, main video, main embed {float: left;
padding: 0px 20px 20px 0; }
- Add main video and main
embed to the following rule
- Create a class named displayImage and configure its value to display:none
- Create a class named displayVideo and configure its value to display:block
- In pacific.css within @media print { } which is for the print
version,
- Configure displayImage to display:block;
- Configure displayVideo to display:none;
- Validate the CSS . Correct and retest if necessary
- There are no changes needed for the mobile version.
- Save and validate the file. Correct and retest if necessary.
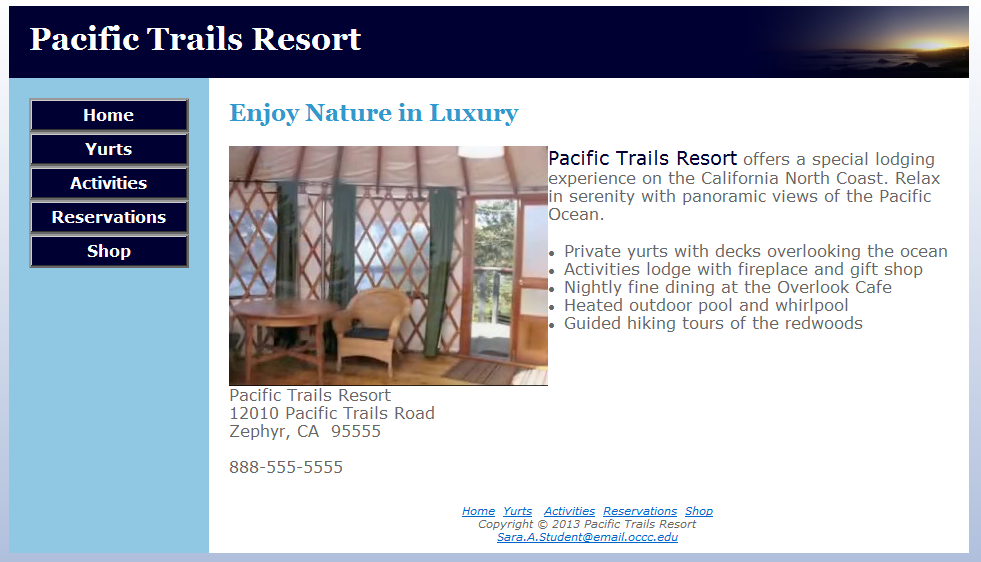 Screen Version: Internet Explorer (The video automatically played. There were no controls at the bottom of the screen) |
 Screen Version: FireFox (Controls at bottom of video and text overlays) |
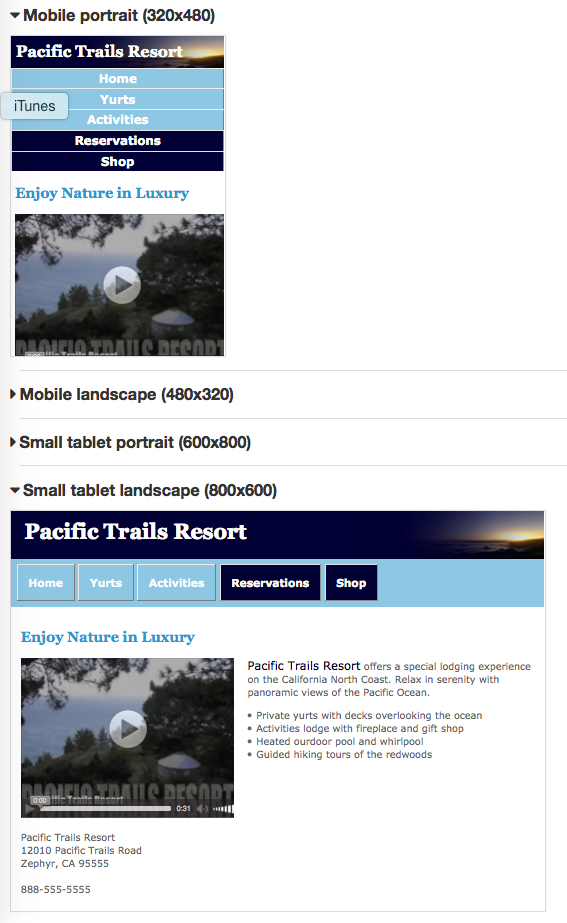 Mobile Version |
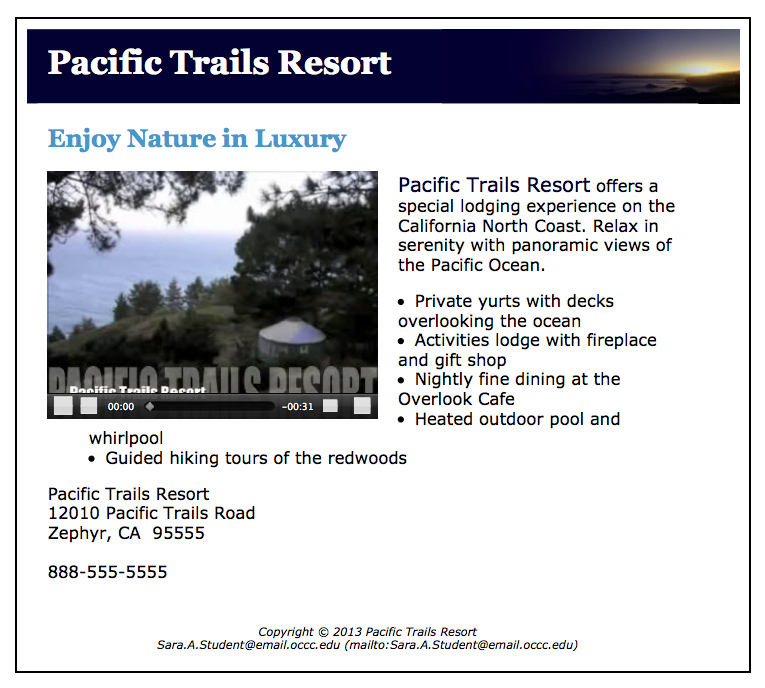 Print Version |
Task 3: Configure the Image Gallery. Modify the external style sheet (pacific.css). Open pacific.css in a text editor. Add styles to configure the video on the home page as shown below.
- Place all of the CSS selectors related to the website gallery in one area of the CSS file. Separate and identify this area using comments, similar to what was done previously. This will make the code easier to read and update as needed. Example: /* ------------------ Gallery -------------------------*/
- Modify the page by adding an image gallery above the footer area. You’ll
need to modify both the activities.html file and the pacific.css file.
Configure a div assigned to the gallery id. This gallery will display four
thumbnail images.
- Just above the </main> tag, configure a <div> with an id of gallery.
- Within that <div> configure and an unordered list that has four <li> elements.
- Each <li> element will contain an <img> tag, one for each of the four thumbnails. The thumbnail images will function as image links with a:hover pseudo-class that causes the larger image to display on the page.
- Within each <li> element, configure an anchor <a> element to contain both the thumbnail image and a <span> element that contains the larger image along with the descriptive text. (p. 479 #4 gives and example).
- Configure the image attributes
- Each thumbnail must have height of 75px, width of 100px, and alt attributes as described in the next item.
- Each full size image must have height of 150px, width of 200px, and alt attributes as described in the next item.
- Add title attribute within the
anchor <a> tag which will be used
when hovering over the images and as a caption for each image in the print
version. The text for each image must be approximately the same
length so the images remained aligned. Suggested text
for the alt and title attributes are as as follows:
Coasts
Waves
Sunsets
Beaches - Instructions are helpful for the user. Otherwise, they may miss
some of the functionality of the website. There will be three options,
mouse over for screen users, click/tap for mobile users, and no
instructions for the print version. Above the closing </main> for
the gallery (right after </ul>)
- For the benefit of Screen Users:
Add a <div> with an id of desktopGallery with the following text: Mouse over an image for a better view. - For the benefit of Mobile Users:
Add another <div> with an id of mobileGallery with the following text: Select an image for a better view. - For the benefit of the Print users.
No additional coding is needed since this text will not be shown in the print version.
- For the benefit of Screen Users:
- Save and validate the file. Correct and retest if necessary.
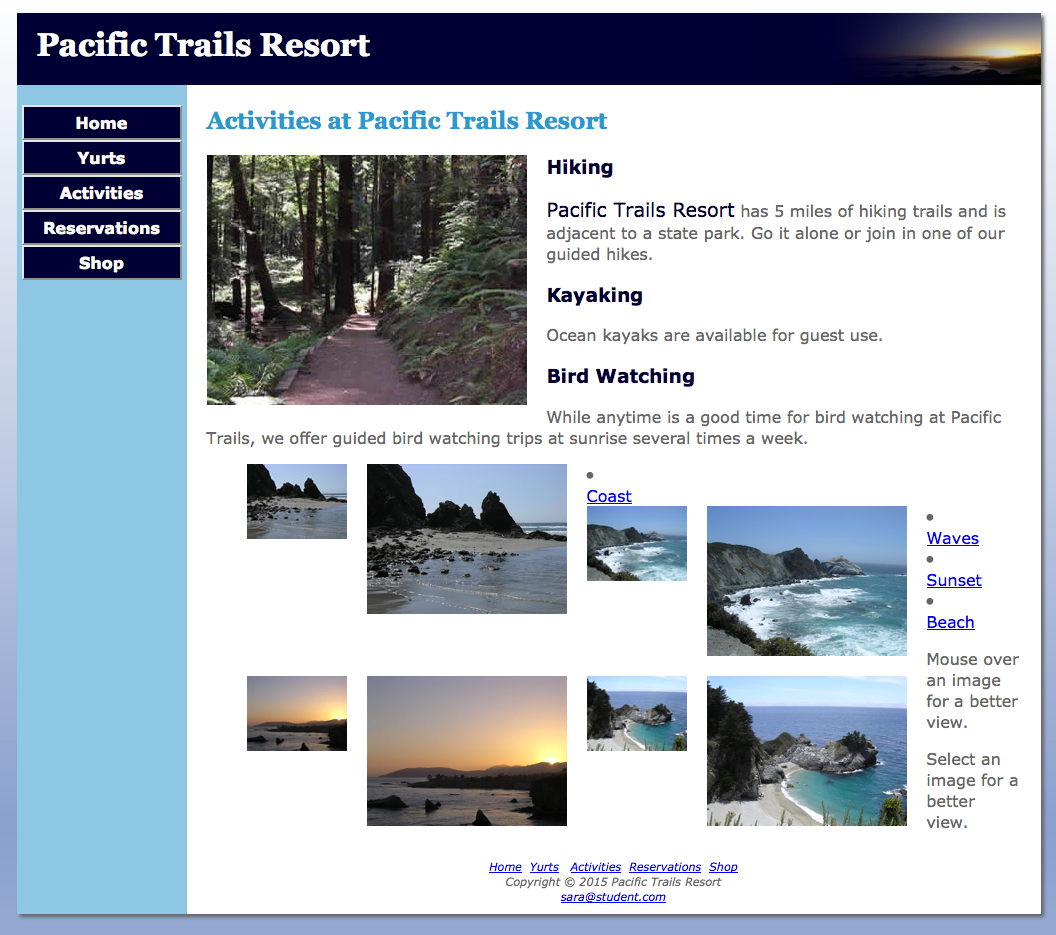
Gallery
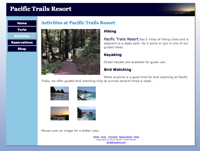
before CSS has been applied.
Task 3: Configure the CSS for the Image Gallery.
-
Modify the external style sheet (pacific.css). Open pacific.css in a text editor. Add styles to configure the gallery on the activities page as shown below.
- Screen Version
- Place all of the CSS selectors related to the gallery in one area of the CSS file. Separate and identify this area using comments, similar to what was done previously. This will make the code easier to read and update as needed. Example: /* ------------------ Gallery -------------------------*/
- The gallery id is used for relative positioning. This does not change the location of the gallery, but instead sets the stage to use absolute positioning on the <span> element in relation to its container (#gallery) instead of relative to the entire web document. This won't matter too much for our very basic example, but would be very helpful if the gallery was part of a more complex web page.
- Configure the gallery with a position of relative, height of 250px,
and clear all floats
#gallery{position:relative;
height:260px;
clear:both;} - Configure the unordered list with a width of 300 px and no list
markers.
#gallery ul {width:300px;
list-style-type:none;} - Configure the list items with inline-block display and left, right
padding of 10px. and top bottom padding of 5px
#gallery li{display:inline-block;
padding:5px 10px;} - Configure the images to have no borders. Also since the images
inherit a float:left from main
img, this must be removed. Style a float:none.
#gallery img {border-style:none;
float:none;} - Configure the anchor tags with no underline, color of dark gray
(#333), and a font-style of italic
#gallery a{text-decoration:none;
color:#333;
font-style:italic;} - Configure the <span> to display only when the web visitor
however the mouse over the thumbnail image link. Set the location of the
span to use absolute positioning . Locate the <span> 10 pixels
down from the top and 300px from the left. Center the text within the
span.

- Modify the <footer> rule to clear all floats.
clear:both; - Configure the mouse over/select images text so that the mouse over
is displayed but the select is not.
#desktopGallery{display:block;}
#mobileGallery{display:none;} - Save and validate the file. Correct and retest if necessary.
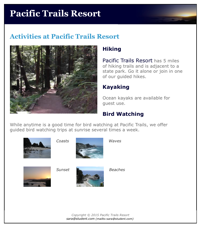
- Print Version
- In pacific.css within @media print { } which is for the print
version,
- It looks more professional with all the content displayed on one
page. Since there are four images, two rows of two images would be
optimum. If there were more images, if there were six then it might be
two rows of three. If there were nine, maybe three rows of three.
Change the width of the unordered
list in the gallery #gallery ul to
425px. This will allow for two images
to be displayed across the pages. This number would be increased or
decreased depending on the size of the images and the number that are
to be in each row.
#gallery ul {width:425px;} - The text that will be displayed is the value assigned to the title property in the <a>
tag. Pseudo elements will be used for this.
#gallery a:after {content:attr(title);} - Float the thumbnail images to the left so the description can be
on the right
#gallery ul a img{ float:left; } - Do not display the mouse over/select text. This can be done by
setting display to none.
#desktopGallery{display:none;}
#mobileGallery{display:none;} - Save and validate the file. Correct and retest if necessary.
- It looks more professional with all the content displayed on one
page. Since there are four images, two rows of two images would be
optimum. If there were more images, if there were six then it might be
two rows of three. If there were nine, maybe three rows of three.
Change the width of the unordered
list in the gallery #gallery ul to
425px. This will allow for two images
to be displayed across the pages. This number would be increased or
decreased depending on the size of the images and the number that are
to be in each row.
- In pacific.css within @media print { } which is for the print
version,
- Mobile Version
- In pacific.css within @media only screen and (max-width:768px) which is for the mobile version,
- Configure the mouse over/select images text so that the select
message is displayed but the mouse over is not.
#desktopGallery{display:none;}
#mobileGallery{display:block;} - "Remove" the styles for #gallery a:hover
span since the user will not be using mouse over on the mobile
version.
#gallery a:hover span {display:none;} - Display the images in the galleries. This is needed because the
other images are not being displayed in the mobile versions.
#gallery img{display:block;} - Save and validate the file. Correct and retest if
necessary.
Mobile Desktop Print 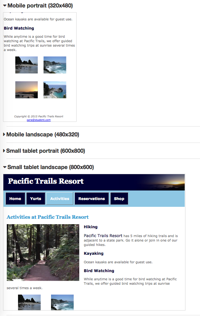
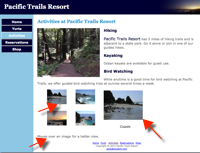
Click on an image to see a larger version
- Screen Version
Chapter 13 - Web Promotion
Task 1: Write a Description. Review the Pacific Trails pages that you created in earlier chapters. Write a brief paragraph that describes the Pacific Trails site. Edit the paragraph down to a description that is only a few sentences and less than 25 words in length.
- Ensure that the charset and viewport meta tags are coded into each of the webpages.
- Add a custom meta tag that includes your name as the author.(required for this course)
- Code a description meta tags (required) Each web page will contain a possibly similar but different description.
- Create keyword meta tags (optional)

Task 2: Update Webpages with Metatags.
- Open each page in a text editor
- Add <meta> tags as described above to the <head> section
- Save and validate the file. View web pages in the browser. They will not look different, but they are much friendlier to search engines!
- If needed, correct and retest if necessary.
- Upload the pages to Apollo, make sure everything displays as it should for all three versions and that everything validates (except for the items discussed in previous lesson.
Final Steps :
Publishing:
FileZilla upload the entire pacific09 folder to your Apollo web site.
- Access your web pages using the following URL http://apollo.occc.edu/user#####/pacific09 (user##### will be replaced by the login provided by your instructor.)
- The Pacific Trails Resort homepage must appear without any further navigation or clicking.
Desktop Version:
- Display your pages in a desktop browser.
- The pages should look the same as they did before you started this case study.
- Validate the CSS and HTM on ALL pages - Extra Credit included.
- Test the navigation between the pages.
Tablet Version:
- Validate the CSS and HTM on all pages.
- Use the Web Developer Tool Bar (Addon for Chrome or Firefox). Go to Resize | View Responsive Layouts. Check the the landscape and portrait versions for both tablet and small tablet. Click on each of the links (Home, Yurts, Activities) to verify that the pages display correctly.
- Test the navigation between the pages.
Smartphone Version:
- Validate the CSS and HTM on all pages.
- Use the Web Developer Tool Bar (Addon for Chrome or Firefox). Go to Resize | View Responsive Layouts. Check the the landscape and portrait versions for mobile. Click on each of the links (Home, Yurts, Activities) to verify that the pages display correctly.
- Test the navigation between the pages.
Print Version:
It is recommended that Print Preview or Preview as PDF be used to save paper and printer ink/toner.
- To check this in the browser, print background color must be turned on.
- FireFox: in Print check the boxes for "Print Background Colors” and "Print Background Images".
- Internet Explorer: in Page Setup check "Print Background Color and Images"
- Safari: in Print check "Print Backgrounds"
- Chrome: under Options select "Background Color and Images"
- Be sure the buttons do not display in the print version.
- Print version will be graded in Firefox and/or Chrome.
Common Requirements for All Web Pages
- The web pages must display correctly in all of the following: FireFox, Chrome, Internet Explorer.
- The links between the existing pages with the Pacific Trails Resort website cannot be broken.
- All HTML and CSS code must be well documented, properly indented, and
easy to read.
http://css-tricks.com/examples/CleanCode/Beautiful-HTML.png
http://coding.smashingmagazine.com/2008/05/02/improving-code-readability-with-css-styleguides/
Mandatory Requirements
Failure to adhere to and/or include the following items will prevent the assignment from being graded.
Note: If time permits, the assignment can be resubmitted during the late/resubmit period, but there will be a 10% penalty.
- No additional formatting is allowed at this point in time only what is outlined in the text.
- All pages must include DOCTYPE, <meta> tag, and <html> tag information.
- The link to the web page in the submission area of the LMS must open the homepage in a new browser window.
- All web pages must validate (HTML5 and CSS) without errors using the Web Developer Tool Bar in FireFox or Google Chrome.
Validate for CSS3.
Assignment Submission:
- Uploading to the Apollo Server
- The entire pacific11 folder must be uploaded to the server
- The homepage for the Pacific Trails Resort website must be index.html
- Submitting the URL within the LMS
- In the LMS, use the submission area located in this week's folder
- In the text box, create a links to both websites.
- The web pages must open in a new
window.
Need help creating the link? Check out "Submitting an URL in the LMS" which is located in the Help Files, References, and Tutorials folder (inside the LMS) - Clicking on the http://apollo.occc.edu/#####/pacific11 link must result in the home pages being displayed. If a listing of files/folders is displayed, there is an error. (##### is to be replaced by your login)
There are two parts to submitting the assignment: uploading the website to the Apollo server and submitting the URL within the LMS.