After the files have been transferred/uploaded/published to the server, they can be accessed by typing the URL in the browser's Address textbox. The URL would be
http://apollo.occc.edu/user#####
where user##### represents your username. Note: Your instructor will assign your login names. In this demonstration user14001 would be http://apollo.occc.edu/user14001 This will display the default page, an error message
.
Depending on the server, the default page is named index.htm, index.html, default.htm or default.html. The system administrator sets this option. If you want to display a web page other than the default page, then the path and file name must be included in the URL. For example, if user14001 wanted to display australia.htm, the url would be
http://apollo.occc.edu/user14001/australia.htm
Notice that the protocol for displaying the web pages is http( Hyper Text Transfer Protocol)
Transferring Files
The FTP (File Transfer Protocol) is used to transfer files between local (your computer) and remote (the server) locations. ftp://apollo.occc.edu However, we will be using a FTP program so the protocol is handled by Filezilla and we, as users, do not need to enter it.
Install Filezilla
Download and install FileZilla Client for your operating system
https://filezilla-project.org/download.php?show_all=1
Using Filezilla
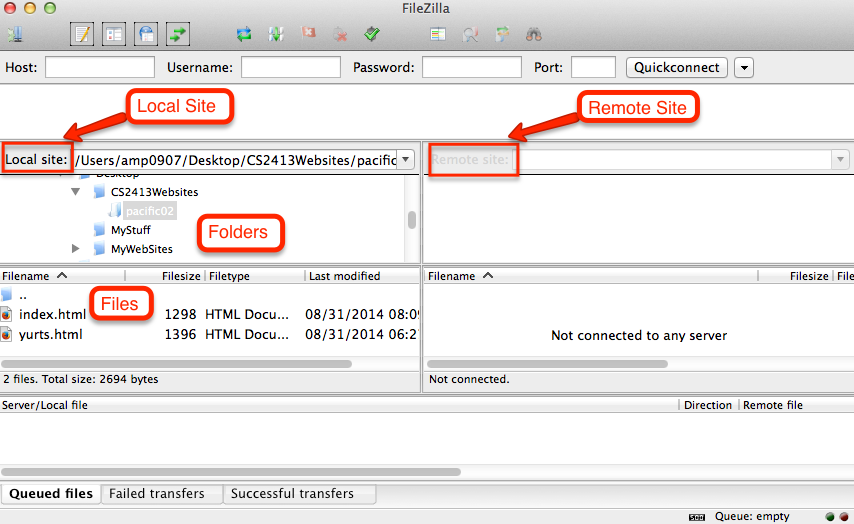
When the program is first run, the files on the local site (your computer) will appear in the left panel. The user can navigate to the folder containing the web site files. Clicking on an arrow opens/closes the folder. Clicking on the folder icon opens the folder in the Files section. Clicking on the .. takes the user up a level in the folder/directory structure.
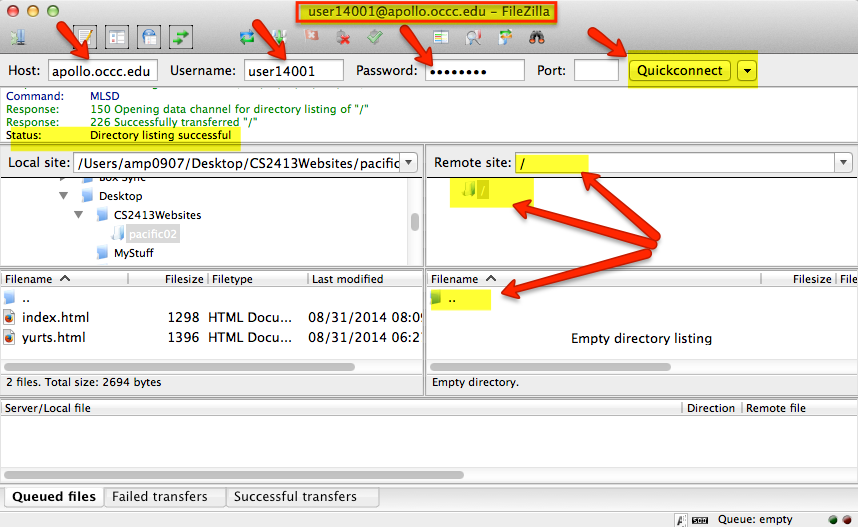
- Enter your login information as shown below
Host: apollo.occc.edu Username: Login from professor Password: Password from professor- Click on Quickconnect
- Once you have connected, the files that are on your website on the server will appear in the remote site panel.
- For this example, the user name (logon) of user14001 is being used.
- The first time the site is accessed the remote site, the folder, and file sections will be empty.
- Later on, some of the folders may have
which appears to indicate the folder has not been opened. It "appears" to go away once it is opened. (Documentation does not address this, it is just an observation which may or may not be true.)
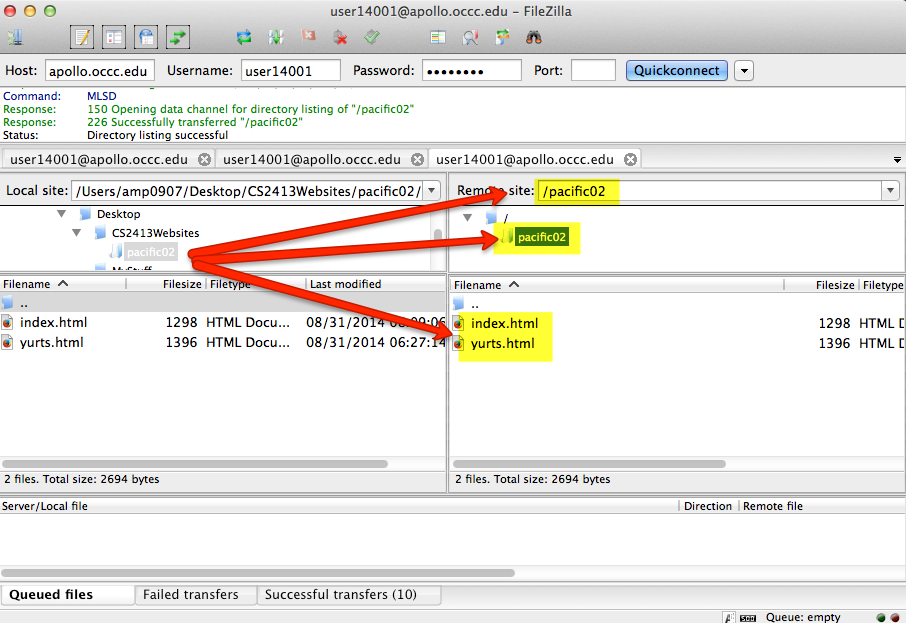
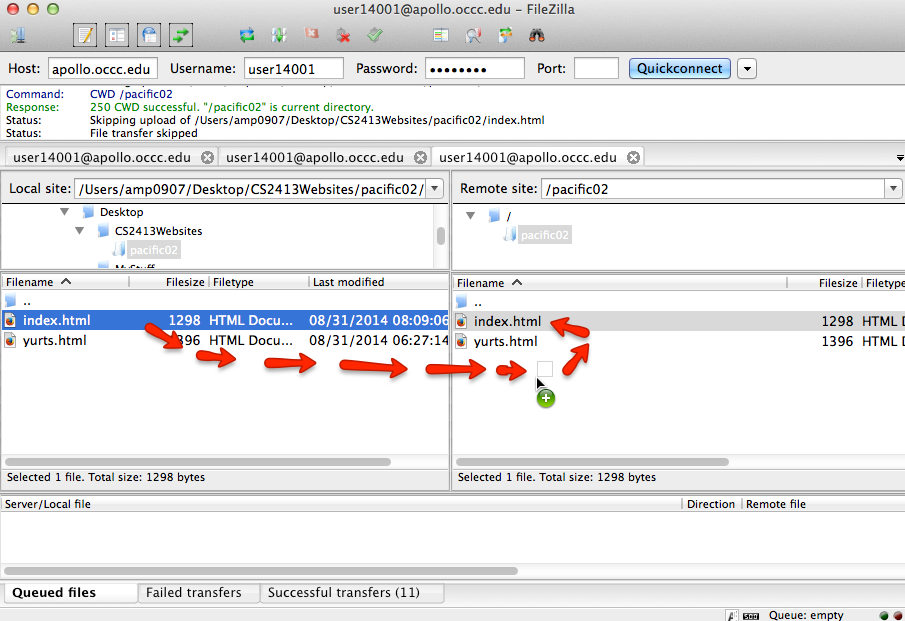
- To upload (publish) or download a file, just drag it from one side (Local/Remote) to the other (Local/Remote).
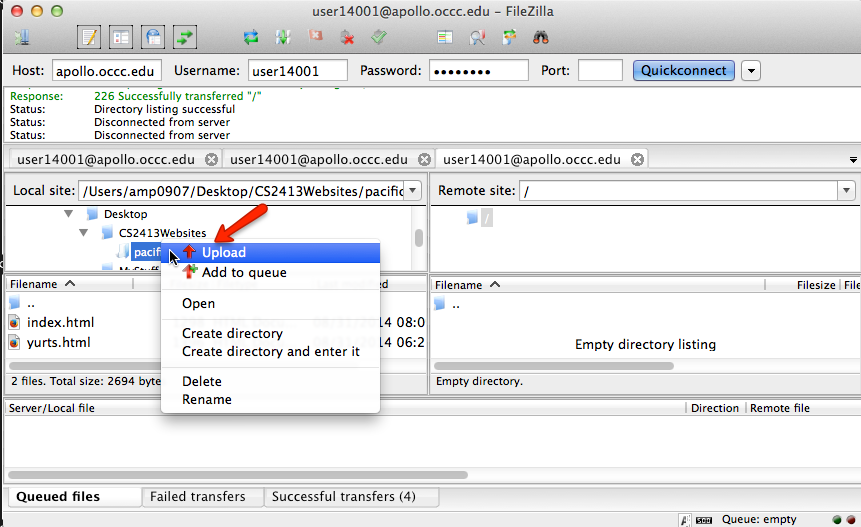
It is almost too easy!!!! If that does not work, then right click and select Upload from the popup menu.- Files OR Folders can be copied from one location to the other.
- To open a folder, double-click on the yellow folder icon or the text to the right.
- The panels can be resized. The process is similar to other desktop applications. Move the cursor over
the borders of the panels. When the double arrow icon appears, hold down the left mouse button and drag the border until the desired height or width is obtained. Then release the mouse button.
- To go up a level in the folder/directory structure (example: return to the root directory)
click on- To Rename, Create a Directory (Folder), Delete, right-click and make a choice from the popup menu (see graphic)
- To upload a single file. Make sure the related folders are open on both the local and remote server.
- Then just drag the file from one file section to the other.
- This method can be used for both uploading and downloading files.
Exiting FileZilla
If you are working on a public computer (classroom or Student Computer Center). this step is extremely important so the next user does not have access to your website. Note: It may look slightly different depending on the Mac or Windows version.
From the Edit menu Click on Clear private data... so that your account information will be deleted.
The first two checkboxes will be selected by default. Be sure all four are checked. Then click OK.
If you are not on a public computer, you can opt to skip the "Clear private data" step. The next time you login, click on the down arrow next to Quickconnect, and click on your login information.
To disconnect, click on the Disconnect icon on the toolbar. Then exit the program (File | Exit) or click on the red x in the upper right corner.
To refresh your file listings press F5 or click on the
Viewing Web Pages
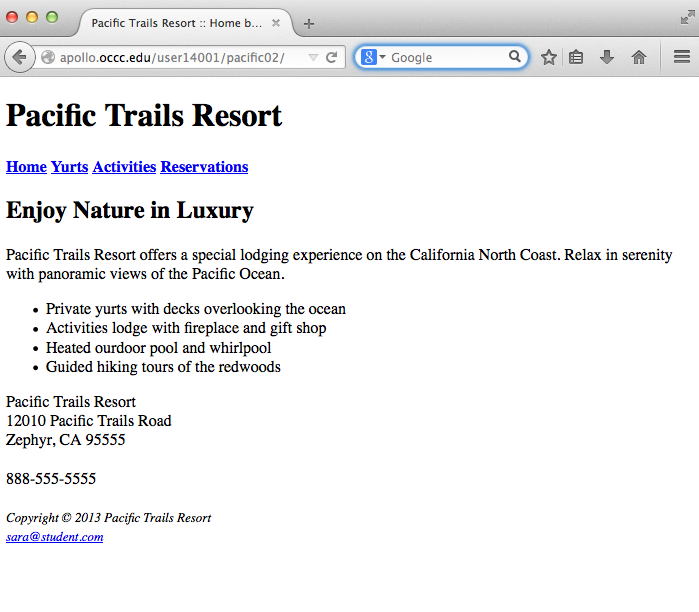
Now it is time to view your webpage. Open a browser such as FireFox or Chrome and enter your URL in the address bar. In this example the URL would be http://apollo.occc.edu/user14001/pacific02 or simply apollo.occc.edu/user14001/pacific02. Important: When viewing a webpage in the browser, it is permissable to no include htt://. However when creating links in HTML code the http:// MUST be included. Correct Example: <a href="http://www.occc.edu">OCCC</a>. Merely using <a href="www.occc.edu">OCCC</a> will NOT work.
